Noti 무한 스크롤링 구현하기
Noti 무한 스크롤링 구현하기 — #개발자의도구들 🚨📝 📖 📒✏️💡🔍 AI스쿨 msa기반 java 백엔드 코스 중에 공부한 내용을 ...
#개발자의도구들
🚨📝 📖 📒✏️💡🔍
AI스쿨 msa기반 java 백엔드 코스 중에 공부한 내용을 작성하였습니다
\* 현재 Spring x 프로젝트를 진행하고 있습니다. 전체 목차를 보시려면 여기를 눌러주세요.
\* 해당 프로젝트 이전에 공부한 내용을 보시려면 여기를 눌러주세요.
| 💡 Tips |
|---|
Noti UI를 만들자
이전글에서 무한 스크롤링의 기본적인 개념과 구현까지 완료하였습니다. 이번에는 이전에 설계한 noti API와 연동하여 무한스크롤링 기능을 사용하려고 합니다.
UI를 만들며 고려해야할 것 들
서버의 DTO는 최대한 사용하지 않는 것이 좋다고 배웠는데, 이는 DTO를 돌려쓰다가 코드가 꼬이는 경우가 많기 때문입니다. 그만큼 서버에서는 다양한 상황이 발생할 수 있기 때문에, 최대한 코드를 쪼개서 쓰는 것이 좋습니다.
하지만, 프론트의 경우는 UI와 관련된 부분이 많기 때문에 돌려쓰는게 훨씬 좋습니다. 어차피 똑같이 그리는건데 궂이 같은 코드를 여러번 사용할 필요가 없기 때문입니다.
또한 동적으로 변하는 것들은 그냥 파라미터로 넘겨서 구현하면 됩니다. 예를들어 크기, 넓이, 높이와 같은 것들이죠.
그래서 제 코드에는 제가 만든 커스텀 @Composable이 많이 있습니다. 이는 기회가 된다면 따로 정리해보고자 합니다. 아무튼 그점을 감안하고 코드를 봐주시면 좋겠습니다.
Component
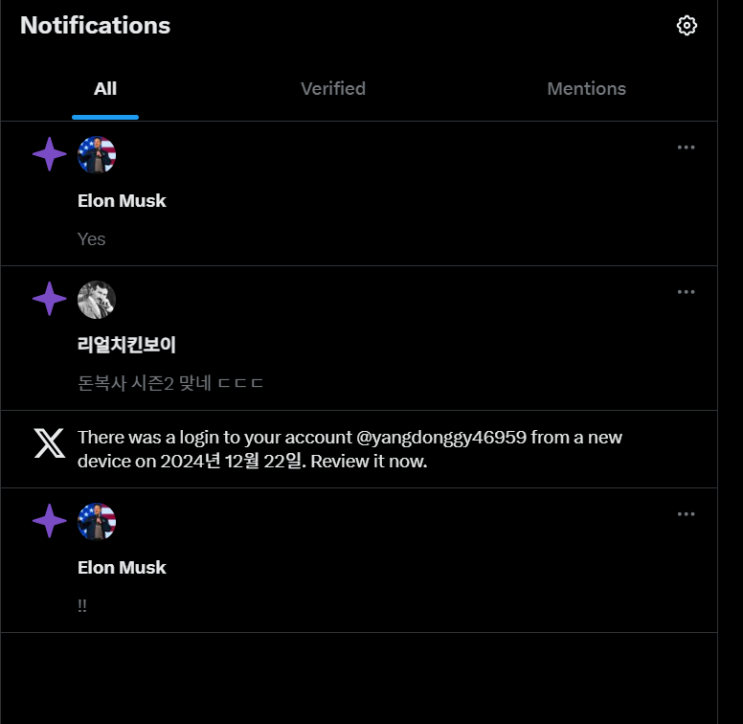
기본적으로 Notisms 같은 패턴이 반복되는 구조입니다..

이런 UI가 반복되어 나오는데 저는 이를 아래 코드로 구현하였습니다.
                                    @Composable
fun NotiContainer(
    item: NotiItem,
    onProfileClick: (Long) -> Unit
) {
    Column(
        modifier = Modifier.fillMaxWidth()
            .padding(14.dp)
    ) {
        ProfileImg(
            size = 24.dp,
            imagePainter = null, // add url of item ...
        ) { onProfileClick(item.publisherId) }

        // usernmae
        Text(text = item.publisherName, fontWeight = FontWeight.Bold)
        Spacer(modifier = Modifier.height(10.dp))
        // textContent
        Text(text = item.message)
    }
}
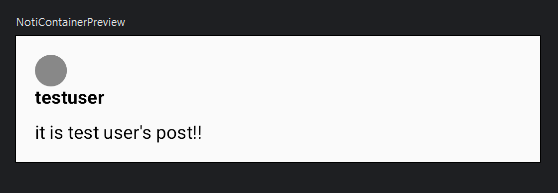
이 정도면 된 것 같네요.
infinite-scrolling-box
이건 따로 팰 필요는 없지만, Screen 코드를 최대한 간략하게 만들고 싶어서 따로 뱄습니다.
                                    @Composable
fun InfiniteScrollNotiBox(
    modifier: Modifier = Modifier,
    items: List<NotiItem>,
    fetchPrev: () -> Unit,
    fetchNext: () -> Unit,
    onProfileClick: (Long) -> Unit
) {
    val lazyListState = rememberLazyListState()

    val reachedBottom: Boolean by remember {
        derivedStateOf {
            val lastVisibleItem = lazyListState.layoutInfo.visibleItemsInfo.lastOrNull()
            lastVisibleItem?.index != 0 && lastVisibleItem?.index ==
                    lazyListState.layoutInfo.totalItemsCount - 1
        }
    }

    LaunchedEffect(reachedBottom) {
        Log.i("infiniteNoti", "is bottom? ${reachedBottom}")
        if (reachedBottom) {
            fetchNext()
            Log.i("infiniteNoti", "fetch next")
        }
    }

    LazyColumn(
        state = lazyListState,
        modifier = Modifier.fillMaxSize()
            .padding(bottom = 55.dp)
    ) {
        items(items.size) { index ->
            val item = items[index]
            NotiContainer(
                item = item,
                onProfileClick = onProfileClick,
            )
        }
    }
}
                                    data class NotiItem(
    val publisherImgUrl: String?,
    val message: String,
    val publisherName: String,
    val publisherId: Long
) {
    companion object {
        fun of(result: NotificationGetResult): NotiItem{
            return NotiItem(
                publisherImgUrl = result.publisherImgUrl,
                publisherName = result.publisherName,
                message = result.message,
                publisherId = result.publisherId
            )
        }
    }
}
이렇게 item으로 데이터를 관리하면 매우 편리합니다.
Screen - viewModel
                                    @Composable
fun NotificationScreen(
    notiViewModel: NotiViewModel = hiltViewModel(),
    navController: NavController,
    userId: Long
) {
    val items by notiViewModel.notiItem.collectAsState()

    LaunchedEffect(userId) {
        notiViewModel.fetchNotiInit()
    }

    val onProfileClick: (Long) -> Unit = { id ->
        navController.navigate("noti/${id}}")
    }

    Column(
        modifier = Modifier
            .fillMaxSize()
    ) {
        InfiniteScrollNotiBox(
            items = items,
            fetchNext = { notiViewModel.fetchNotiNext() },
            fetchPrev = { notiViewModel.fetchNotiPrev() }
        ) { }
    }
}
                                    @HiltViewModel
class NotiViewModel @Inject constructor(
    private val notiRepository: NotiRepository
    // user profile group 정보
    // 단일 board에 대한 정보를 가져와야 한다.
): ViewModel() {
    private val _userId = MutableStateFlow<Long?>(null)
    val userId: StateFlow<Long?> = _userId

    fun setUserId(id: Long) {
        _userId.value = id
    }

    private val _startNotId = MutableStateFlow<Long?>(null)
    val startNotId: StateFlow<Long?> = _startNotId

    private val _endNotId = MutableStateFlow<Long?>(null)
    val endNotiId: StateFlow<Long?> = _endNotId

    private val _notiItems = MutableStateFlow<List<NotiItem>>(emptyList())
    val notiItem: StateFlow<List<NotiItem>> = _notiItems

    private fun updateNotiIds(result: List<NotificationGetResult>) {
        _startNotId.value = result.minOf {it.notiId }
        _endNotId.value = result.maxOf { it.notiId }
    }

    fun fetchNotiInit() {
        viewModelScope.launch(Dispatchers.IO) {
            Log.d("notiViewModel", "fetch init noti!")

            val result = notiRepository.fetchNotiInit(
                request = NotificationGetInitRequest(
                    receiverId = 10 // for testing
                )
            )

            if (result.isSuccess) {
                viewModelScope.launch(Dispatchers.Main) {
                    val resultDtos = result.getOrNull()
                    resultDtos?.let {
                        _notiItems.value = resultDtos.map { NotiItem.of(it) }
                        updateNotiIds(resultDtos)
                    }
                }
            }
        }
    }

    fun fetchNotiPrev() {
        viewModelScope.launch(Dispatchers.IO) {
            Log.d("notiViewModel", "fetch prev Noti")

            val result = notiRepository.fetchNotiPrev(
                NotificationGetRequest(
                    receiverId = 10,
                    startId = _startNotId.value?: return@launch,
                    endId = _endNotId.value?: return@launch
                )
            )

            if (result.isSuccess) {
                viewModelScope.launch(Dispatchers.Main) {
                    val resultDto = result.getOrNull()
                    if (resultDto != null) {
                        _notiItems.value = resultDto.map { NotiItem.of(it) } + _notiItems.value
                        updateNotiIds(resultDto)
                    }
                }
            }

        }
    }

    fun fetchNotiNext() {
        viewModelScope.launch(Dispatchers.IO) {
            Log.d("notiViewModel", "fetch next Noti")
            Log.d("notiViewModel", "start & end: ${_startNotId.value} ${endNotiId.value}")

            val result = notiRepository.fetchNotiNext(
                NotificationGetRequest(
                    receiverId = 10,
                    startId = _startNotId.value?: return@launch,
                    endId = _endNotId.value?: return@launch
                )
            )
            Log.d("notiViewModel", "fetch?")

            if (result.isSuccess) {
                viewModelScope.launch(Dispatchers.Main) {
                    val resultDto = result.getOrNull()
                    if (resultDto != null) {
                        _notiItems.value += resultDto.map { NotiItem.of(it) }
                        updateNotiIds(resultDto)
                    }
                }
            }

        }
    }
}
이전 무한스크롤링 글과 맥락은 완전 동일합니다. 변경된점은 viewModel에서 items를 관리하는 점과, 추가되는 item이 api로 부터 넘어온다는 것입니다.
완성
서버로 부터 계속 데이터가 넘어오는 것을 볼 수 있습니다.
개발하면서 느낀점
분명 timeline에서 한번 해봤는데 많이 해맸습니다... 하면서 느낀게 좀 체계적으로 프론트와 연동해야하겠다는 생각이 들었습니다.
그래서 다음과 같은 순서를 따라보고자합니다.
                                    업무 효율화
1. api를 테스트한다.
2. ui를 만든다.
-- 1과 2는 독립시행 ---

if 1번이 완벽하게 테스팅 되었다면,  아래를 진행한다.

1. ui에 viewModel을 붙인다.
2. front와 server를 테스트한다.
별거 아닌거 같아도 사소한 실수때문에 시간을 꽤나 잡아먹어서, 꼭 짚고 넘어가고 싶었습니다.